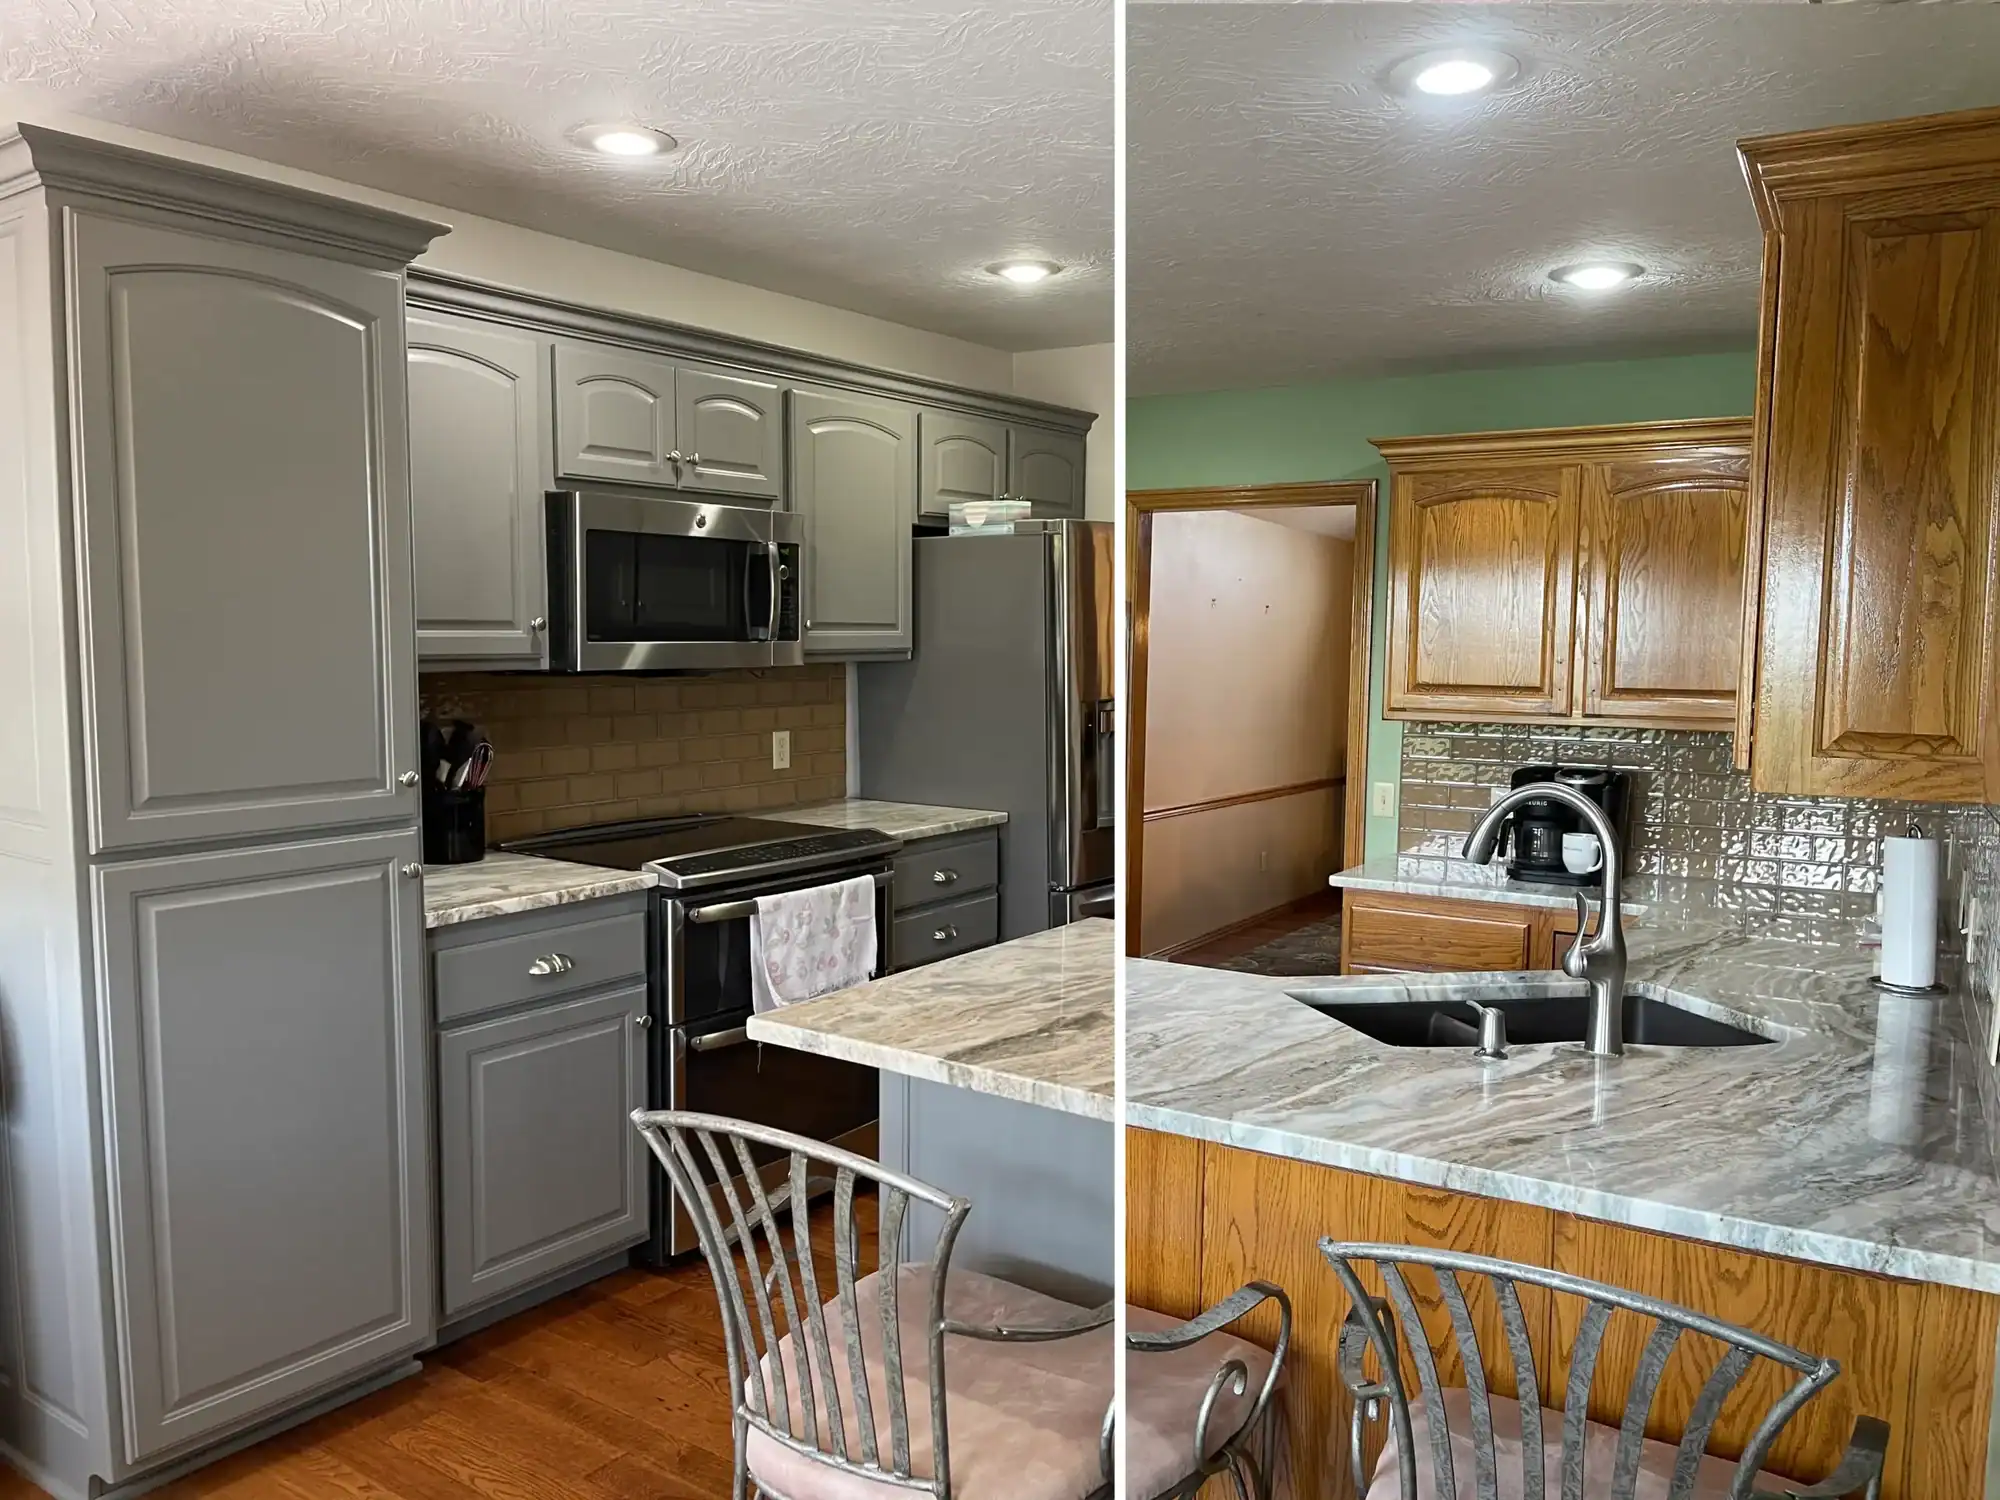
If you’re painting cabinets and want a smooth, factory-style finish, the quickest way to ruin the project is by skipping the essential steps. Most of the regrets homeowners face—like peeling, tacky surfaces, brush marks, or uneven color—come from simple but costly mistakes. Painting cabinets is far more technical than painting walls, and the products, prep, and application methods must be precise. When done properly, you’ll have a durable, high-end finish. When done incorrectly, the problems begin within months.
Key Takeaways Before You Start
-
Painting cabinets requires specialty primers and enamel systems engineered for hard-use surfaces.
-
Any missed prep step will show through the paint—sometimes immediately, sometimes months later.
-
Rushing drying and curing is one of the most common and expensive homeowner mistakes.
-
Using professional-grade products and methods dramatically improves durability and appearance.
1. Skipping Proper Surface Cleaning
Grease, fingerprints, cooking oils, and silicone residue build up on kitchen cabinets. When painting cabinets, these contaminants stop primers and enamel from bonding. Homeowners often underestimate how stubborn kitchen residue really is. Even mild dish soap leaves behind oils that interfere with adhesion.
Professionals use industrial degreasers or TSP alternatives because they break down invisible grease films. Without this step, you’ll see peeling around handles, flaking near hinges, and paint sliding off in sheets. Proper cabinet painting always starts with surface decontamination—not color.
2. Sanding Incorrectly or Barely Sanding at All
Sanding is nonnegotiable when painting cabinets. A glossy, factory-coated cabinet has no tooth for enamel to grip. Lightly scuffing with a sanding sponge isn’t enough; you must break the sheen consistently across every surface.
Professionals sand with 180–220 grit, remove dust with vacuums and tack cloths, and hit profiles by hand. Some surfaces benefit from a liquid deglosser followed by mechanical sanding for optimal adhesion. Homeowners who skip proper sanding usually see premature peeling, especially near high-contact areas.
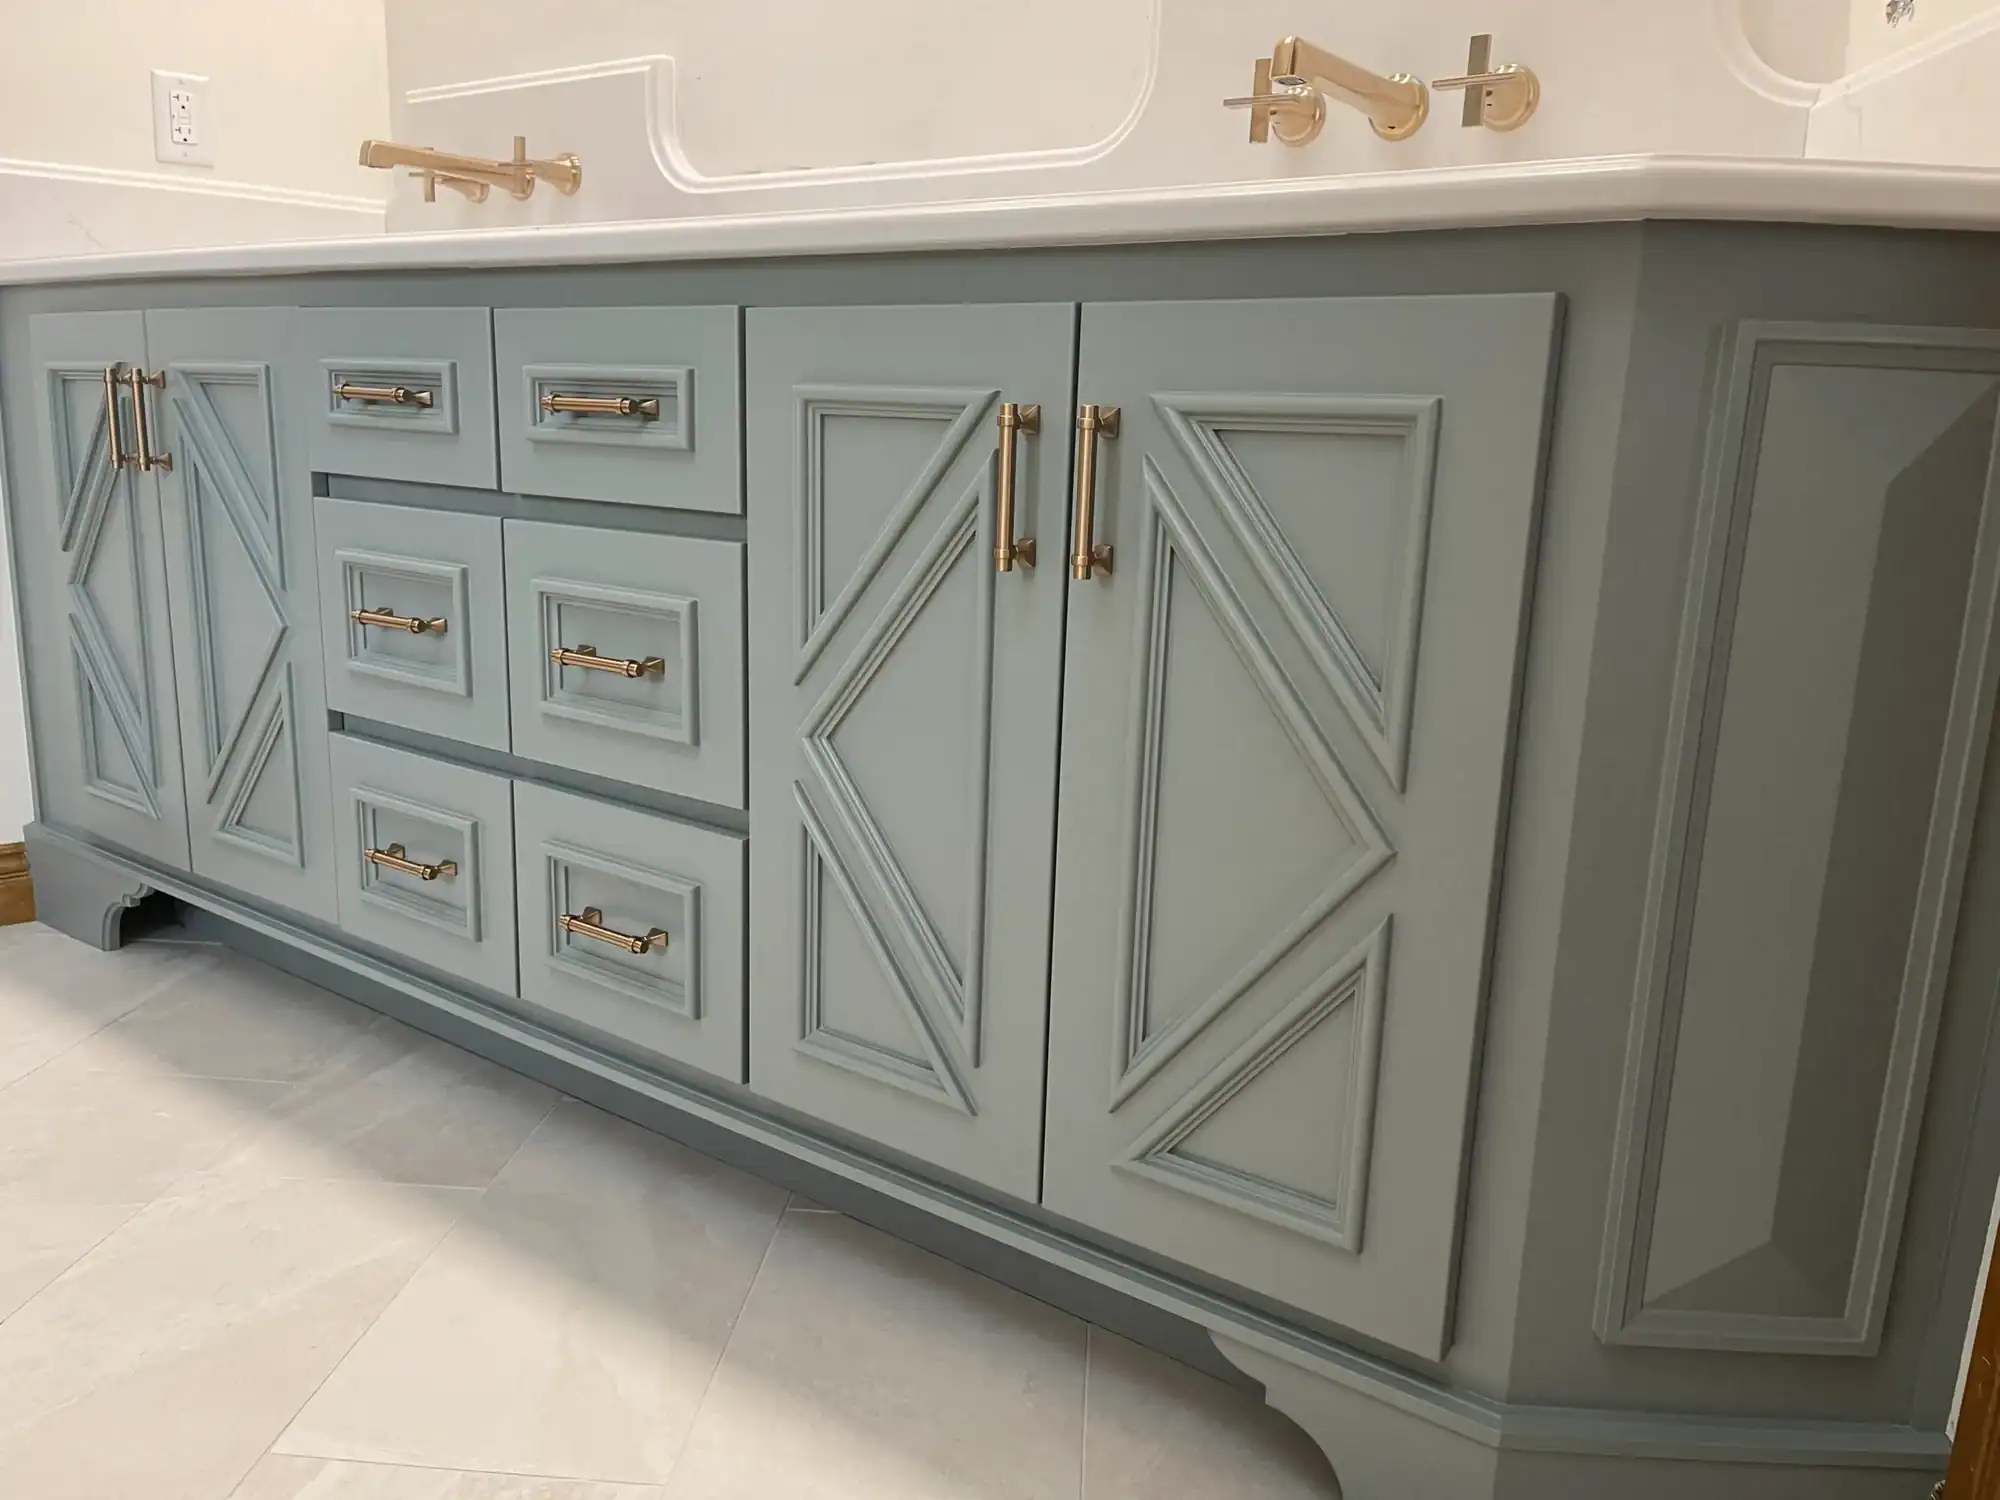
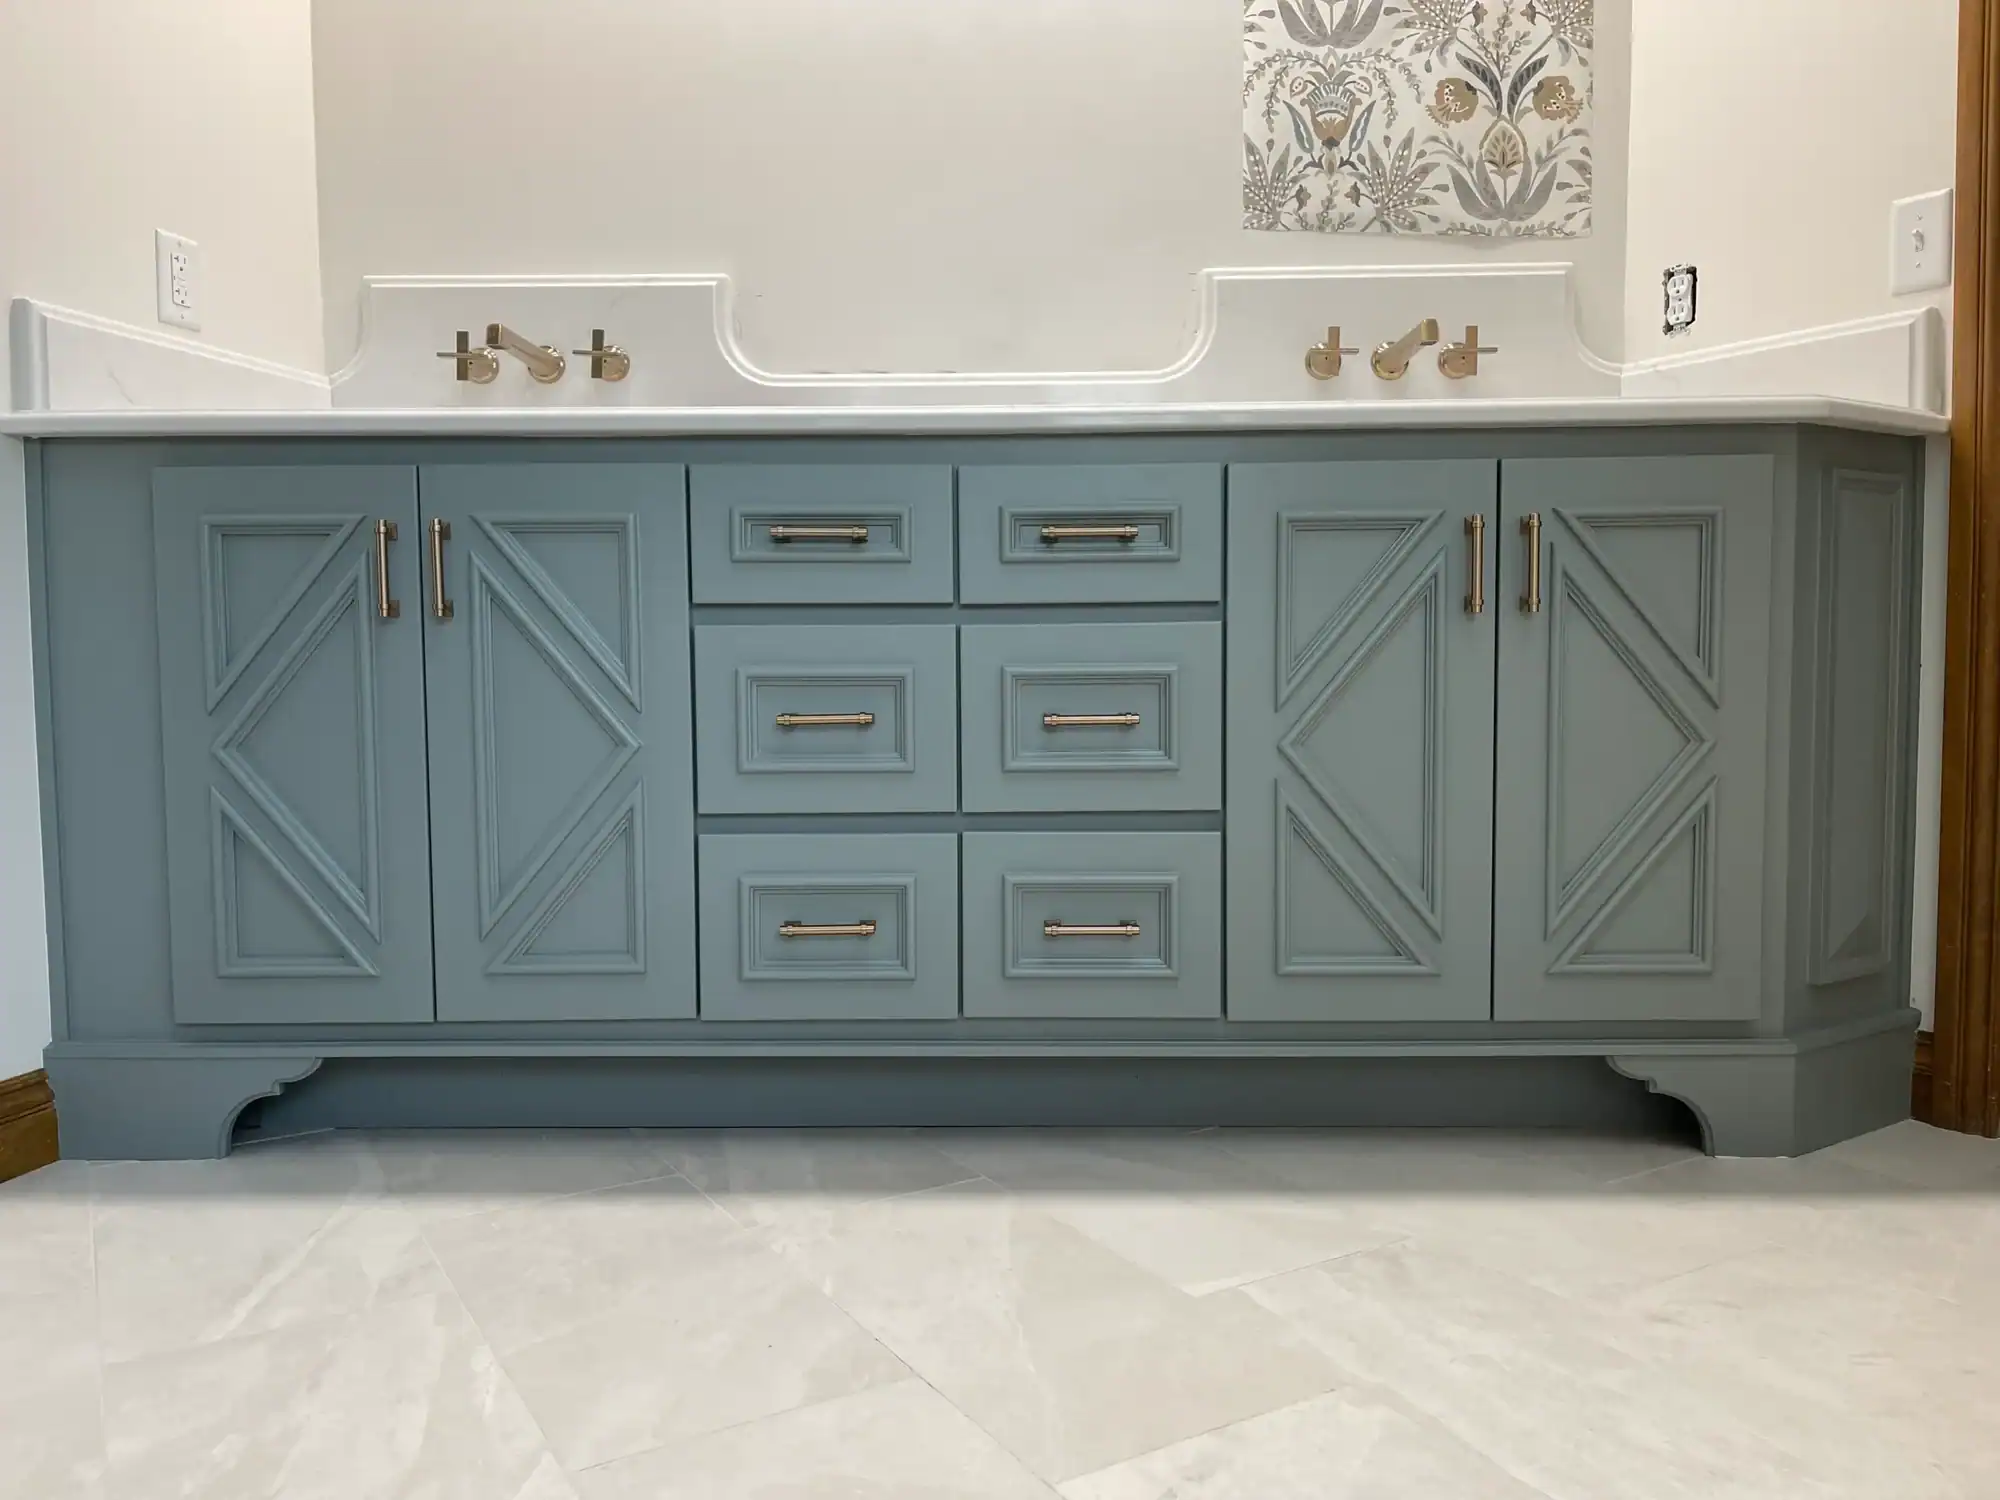
3. Using Wall Paint Instead of Cabinet-Grade Enamel
This mistake ruins more cabinet projects than almost anything else. Wall paint is simply not engineered for the abuse cabinets take. Its resin structure is too soft and flexible, which causes smudges, chips, and blocking (paint sticking to itself).
Cabinet painting requires a bonding primer and a hard-curing enamel, usually an acrylic-alkyd hybrid. These formulas level beautifully and cure into a durable shell. If you prefer environmentally responsible options, check resources like ecolabels on paint and standards on greener products, which help homeowners identify safer, low-emission products that still meet performance requirements.
Using the wrong paint leaves homeowners with sticky surfaces and easy scratches—issues that can’t be corrected without stripping and restarting.
4. Not Labeling Doors and Hardware
Mistakenly reinstalling cabinet doors in the wrong location leads to misaligned gaps, rubbing edges, and hinges that no longer sit correctly. Cabinet doors are set to their original openings, and even slight differences cause functional issues later.
Pros number everything: doors, drawer faces, hardware bags, hinge plates, and mounting points. This ensures each piece returns to its exact placement after spraying or brushing. Skipping this step leads to squeaks, stiffness, or cabinets that never fully close.
5. Rushing Dry Times
One of the most frustrating failures in painting cabinets comes from impatience. Enamels don’t just dry—they cure. If a second coat is applied too soon, if doors are stacked before they’ve hardened, or if hardware is reinstalled prematurely, the surface imprints or dents permanently.
Professionals follow manufacturer curing timelines exactly, often waiting several days between stages. Homeowners who try to finish the project in a weekend usually end up with sticky or uneven finishes that stay soft for weeks.
6. Applying Paint Too Thick
Thick coats create sagging, slow curing, brush ridges, and uneven sheen. When painting cabinets, the key is controlled, ultra-thin layers. Heavy coats trap solvents and remain soft or tacky much longer than expected.
Pros use fine-finish brushes, high-density foam rollers, or HVLP/airless sprayers to create thin, even coats that level out smoothly. Multiple thin passes build a durable, professional look. Thick coats do the opposite—they emphasize flaws and create long-term curing problems.
7. Using the Wrong Primer or Skipping Primer Entirely
Cabinets require primers that bond aggressively and block stains. Many homeowners mistakenly use general-purpose primer or—worse—apply enamel directly onto wood or laminate.
Depending on the cabinet material, cabinet painting may require:
-
A bonding primer for slick laminate or thermofoil
-
A stain-blocking primer for oak, cherry, or pine
-
A sandable primer for ultra-smooth finishes
Skipping or misusing primer causes discoloration, grain bleed-through, and widespread adhesion failure.
8. Painting Cabinets in a Dusty Environment
Cabinets attract dust the moment paint goes on. Kitchens, garages, and open rooms allow airborne particles, pet hair, or HVAC air movement to settle into the wet enamel. This creates grit and bumps that are impossible to buff out without repainting.
Professional cabinet painting involves isolating the workspace with plastic sheeting, controlling airflow, filtering intake air, and using dedicated drying zones. Homeowners painting in open spaces often end up with a rough, sandpaper-like finish that feels cheap—even with good products.
9. Reinstalling Hardware Without Protection
Once the enamel begins curing, it is still vulnerable to impressions, scratches, and metal-to-paint contact. Reinstalling handles prematurely often results in crescent-shaped marks, chips around screw holes, or dents from tools.
Pros protect surfaces with padded tables, felt strips, and staged drying racks. Doors are not reinstalled until the finish reaches hardness thresholds that resist pressure and metal contact. Rushing this step leads to preventable cosmetic damage.
Common Questions About Painting Cabinets
How long does professional cabinet painting take?
Most projects take 5–10 days, depending on curing times and the number of doors.
Can laminate cabinets be painted successfully?
Yes—if a high-quality bonding primer is used and the surface is thoroughly cleaned and deglossed.
How long will the finish last?
A properly prepped and professionally painted finish lasts 8–12+ years under normal kitchen use.
Is spraying better than brushing?
Spraying produces the smoothest factory-like finish, but high-quality brushing with enamel can still look excellent.
When is it smarter to hire professionals?
If you want a flawless sprayed finish, have heavily used cabinets, or don’t have the ability to create a dust-free environment, hiring professionals is the best investment.
Get a Factory-Smooth Cabinet Finish Without the Stress
If you want a durable, smooth, and long-lasting result—and want to avoid the most common painting cabinets mistakes—professional cabinet refinishing provides the high-performance results homeowners struggle to achieve on their own. Skilled painters use advanced prep systems, premium bonding primers, spray equipment, and specialty enamels that keep your finish looking new for years.
To learn more or request a cabinet transformation, visit our service page for cabinet painting.